There’s something magical about spending time in the garden on a sunny weekend. Whether you’re surrounded by blooming flowers, lush greenery, or simply a patch of soil waiting for love, your garden is more than just an outdoor space, it’s an extension of your home and personality. And the best part? You don’t need to spend thousands of dollars or hire professional landscapers to make it look stunning.
With a few tools, some affordable materials, and a dash of creativity, you can create beautiful DIY garden projects that not only transform your outdoor space but also give you a sense of accomplishment. From practical builds like compost bins and raised beds to decorative touches like stepping stones and solar lights, there are endless ways to give your garden a makeover over a single weekend.
DIY garden projects are not just about saving money, they’re about adding personal flair, reusing and recycling materials, and creating something unique that truly belongs to you. Plus, they’re perfect for the whole family. Kids love painting pots, assembling bird feeders, or crafting garden markers, while adults can take on slightly bigger builds like trellises or water features.
In this guide, we’ll explore step-by-step instructions for a variety of weekend garden projects. Each idea is beginner-friendly, budget-conscious, and highly rewarding. Whether your goal is to attract wildlife, grow more plants, improve sustainability, or simply decorate, you’ll find inspiration to suit your style and space.
So, grab your gloves, pick a project, and let’s turn your garden into a cozy, functional, and Instagram-worthy haven.
Easy and Affordable Planter Projects
Planters are the backbone of every garden. They bring order, color, and structure to your outdoor space while allowing you to grow plants in creative ways. Instead of buying expensive pots, you can make your own using recycled materials and a bit of imagination.
Here are some planter projects you can finish this weekend.
1. Pallet Planter for Herbs and Flowers
Pallets are cheap, often free, and perfect for vertical gardening. This is a fantastic project if you’re short on space or want a rustic, farmhouse vibe in your backyard.
Materials Needed:
- One or two wooden pallets (heat-treated, not chemically treated)
- Landscaping fabric
- Staple gun & staples
- Hammer and nails (optional for reinforcement)
- Potting soil
- Herbs, flowers, or small vegetables
Step-by-Step Guide:
- Prepare the pallet – Sand it down to remove splinters. Check for loose nails.
- Line with fabric – Staple landscaping fabric on the back and bottom of each horizontal layer to hold soil.
- Fill with soil – Add potting mix into each slot.
- Plant – Insert herbs, small flowers, or trailing plants. Consider mixing colors for a vibrant look.
- Position – Place it vertically against a fence or wall, or keep it lying flat for a raised bed effect.
Paint or stain the pallet for weather protection and style. Use chalkboard paint on the sides to label your herbs.
Variations:
- Succulent wall garden using drought-resistant plants.
- Mini salad garden with lettuce, spinach, and kale.
- Kids’ flower wall where children paint the pallet before planting.
2. Painted Flower Pots
A quick, colorful DIY that adds instant charm to your patio or balcony. Perfect for beginners.
Materials Needed:
- Clay or terracotta pots
- Outdoor acrylic paint (waterproof)
- Paintbrushes and sponges
- Sealant spray
Step-by-Step Guide:
- Clean the pots and let them dry completely.
- Apply a base coat of paint. Bright colors work well for summer; earthy tones are timeless.
- Add patterns-stripes, polka dots, stencils, or even freehand designs.
- Let them dry, then spray with waterproof sealant to protect from rain.
- Plant your favorite flowers, succulents, or herbs.
Use metallic paint for a chic, modern look, or let kids decorate with handprints for a family-friendly project.
Variations:
- Chalkboard paint pots for erasable plant labels.
- Glow-in-the-dark paint pots that shine at night.
3. Upcycled Tin Can Planters
Budget-friendly, eco-friendly, and stylish. Plus, it’s a great way to reuse food cans instead of tossing them.
Materials Needed:
- Large tin cans (soup, beans, coffee)
- Hammer and nails (for drainage holes)
- Spray paint or decorative paper
- Soil and plants
Step-by-Step Guide:
- Wash cans thoroughly and remove labels.
- Punch drainage holes at the bottom.
- Spray-paint in fun colors or wrap with decorative fabric.
- Fill with soil and plant herbs, succulents, or small flowers.
- Group multiple cans together for a vibrant mini garden.
Attach them to a wooden fence or pallet to create a vertical wall of tin-can planters.
4. Hanging Basket DIY (Using Old Household Items)
You don’t need to buy expensive baskets. Old kitchen items like colanders, buckets, or even macrame plant holders make stunning hanging gardens.
Materials Needed:
- Old colander, wire basket, or sturdy bucket
- Chain or strong rope for hanging
- Coconut fiber or moss liner
- Soil and trailing plants (petunias, ivy, strawberries)
Step-by-Step Guide:
- Line the colander/basket with moss or coconut fiber.
- Add soil, leaving room for plant roots.
- Plant trailing flowers or strawberries for a cascading effect.
- Hang in a sunny spot and water regularly.
Use three or more baskets at different heights to create a layered garden feature.
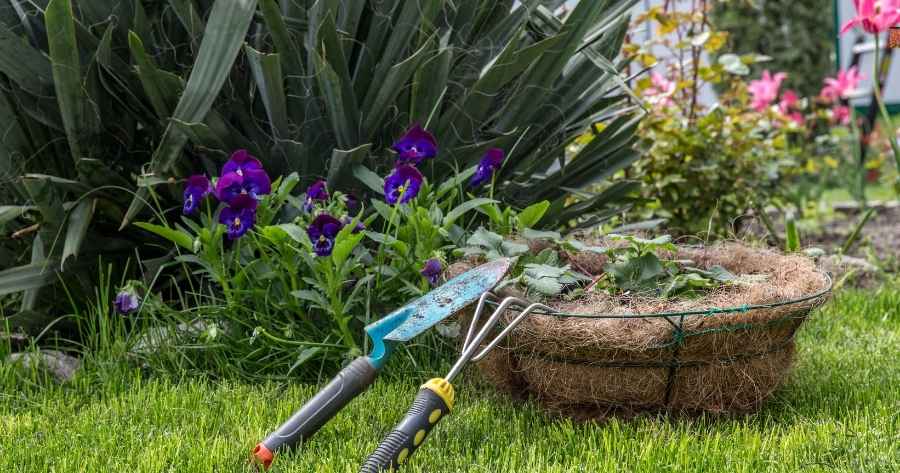
Garden Path and Decoration Projects
A garden isn’t complete without pathways and decorative touches that tie everything together. Paths guide the eye, make the space functional, and decorations add character and personality. The best part? You don’t need professional landscapers or expensive stones—just creativity and a few simple materials.
Here are some DIY garden decoration and path projects you can finish this weekend.
1. DIY Stepping Stones
Stepping stones are both practical and artistic. They create a walkway while adding a personal design element. Kids love making these too, since they can customize each stone with decorations.
Materials Needed:
- Quick-set concrete or cement mix
- Plastic trays, cake pans, or stepping-stone molds
- Decorative items (shells, pebbles, marbles, glass pieces, leaves)
- Cooking spray or Vaseline (to release stones from molds)
Step-by-Step Guide:
- Prepare molds by greasing them lightly with cooking spray.
- Mix concrete according to package instructions.
- Pour mixture into molds about 2 inches deep.
- Press decorative items or imprint leaves/handprints while wet.
- Let cure for 24–48 hours before removing from molds.
- Place the stones along your garden path, spacing evenly.
Add glow-in-the-dark pebbles for a magical evening pathway.
Variations:
- Mosaic stepping stones using broken ceramic tiles.
- Leaf imprint stones for a natural, organic design.
- Personalized stones with children’s handprints or names.
2. Pebble Mosaic Pathways
A pebble mosaic pathway transforms plain dirt or grass into a stunning feature. It’s a bit more labor-intensive but still achievable over a weekend.
Materials Needed:
- Flat pebbles or river stones
- Sand and gravel base
- Edging materials (bricks, timber, or metal edging)
- Garden rake and tamper
Step-by-Step Guide:
- Mark out the path with a garden hose or string.
- Dig a shallow trench (about 3–4 inches deep).
- Lay down a gravel base, then cover with sand.
- Arrange pebbles in patterns-spirals, waves, or geometric shapes.
- Compact with a tamper to secure in place.
- Add edging to keep stones from shifting.
Use contrasting colors of stones (white and black pebbles, for example) for dramatic designs.
Variations:
- Spiral or wave mosaics for a playful look.
- Simple rustic stone path for a natural woodland feel.
3. DIY Garden Signs
Garden signs add personality and function, helping you label plants, herbs, or simply welcome guests with a fun message.
Materials Needed:
- Wooden planks or scrap wood
- Paint and paintbrushes (outdoor-friendly)
- Stencils or freehand lettering
- Stakes or posts for mounting
Step-by-Step Guide:
- Cut wood into the desired shape (rectangle, arrow, or even quirky cutouts).
- Sand edges to avoid splinters.
- Paint background and allow to dry.
- Add text or designs using stencils or freehand. Popular choices: “Herb Garden,” “Welcome,” or plant names.
- Seal with outdoor varnish for weather protection.
- Attach to stakes and place in the garden.
For a rustic look, burn letters into the wood with a wood-burning tool instead of painting.
Variations:
- Mini chalkboard stakes for labeling herbs.
- Funny garden signs like “Trespassers Will Be Composted.”
4. Painted Rock Garden Markers
A simple, kid-friendly craft that doubles as practical plant markers. Painted rocks add a pop of color and charm to garden beds.
Materials Needed:
- Smooth, flat rocks
- Outdoor acrylic paints or paint pens
- Clear varnish or sealant spray
Step-by-Step Guide:
- Wash and dry rocks thoroughly.
- Paint base colors-bright shades make them stand out in the soil.
- Write plant names or draw fun designs (carrots, tomatoes, flowers).
- Seal with waterproof varnish to make them weatherproof.
- Place at the base of plants or in garden rows.
Use glow-in-the-dark paint for garden markers that shine at night.
Variations:
- Themed markers (e.g., cartoon-style veggies).
- Inspirational rocks with uplifting words like “Grow,” “Bloom,” “Hope.”
5. Garden Wind Chimes (Bonus Project)
Wind chimes bring a peaceful, musical element to your garden. They can be made with recycled materials for a unique touch.
Materials Needed:
- Driftwood, bamboo, or a sturdy branch
- Old spoons, keys, shells, or beads
- String or fishing line
- Drill (if using wood or bamboo)
Step-by-Step Guide:
- Choose a base (wooden branch, driftwood, or bamboo piece).
- Drill holes evenly spaced along the top.
- Tie strings and attach objects (spoons, shells, keys).
- Hang from a tree, pergola, or porch.
- Enjoy soothing sounds when the wind blows.
Use bamboo or hollow metal tubes for more musical tones.
Why These Projects Work
Garden paths and decorations serve both aesthetic and functional purposes. Stepping stones prevent muddy shoes, pebble mosaics create durable walkways, and markers help organize your plants. Decorative touches like signs, painted rocks, and wind chimes bring joy, color, and personality to the space.
By combining practicality with creativity, you’re not just decorating—you’re turning your outdoor area into a reflection of yourself. And the beauty of these projects? Each one is affordable, eco-friendly, and achievable within a single weekend.
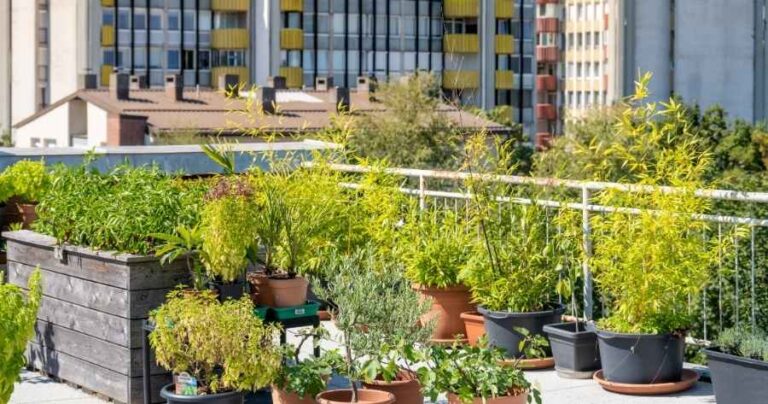
DIY Outdoor Lighting Ideas
Lighting can completely transform the atmosphere of your garden. From cozy evening hangouts to late-night strolls, outdoor lighting adds warmth, security, and ambiance. Instead of expensive electrical installations, you can create budget-friendly, eco-friendly DIY lighting projects this weekend.
1. Mason Jar Solar Lights
Inexpensive, stylish, and eco-friendly. Perfect for lining pathways or decorating tables for outdoor dinners.
Materials Needed:
- Mason jars (with lids)
- Solar garden lights (just the tops)
- Decorative stones, sand, or glass beads
Step-by-Step Guide:
- Remove the stake from a solar garden light.
- Attach the solar light top to a mason jar lid.
- Fill the jar with stones, beads, or sand for stability.
- Screw the lid back on with the solar panel exposed.
- Place jars along walkways, patios, or flower beds.
Variations:
- Frost the jars with spray paint for a soft glow.
- Use colored glass beads for a stained-glass effect.
- Hang jars from tree branches with wire for a fairy-light vibe.
2. Fairy Light Bottles
Easy, romantic, and magical; great for parties or evening relaxation.
Materials Needed:
- Empty wine bottles
- String fairy lights (battery or solar-powered)
- Drill with glass bit (optional if you want a clean entry hole)
Step-by-Step Guide:
- Clean bottles and remove labels.
- Insert fairy lights inside-either through the top or a drilled hole.
- Place bottles around your garden, on tables, or in clusters.
Use different bottle shapes and colors for variety.
3. DIY Bamboo Torches
Adds a tropical feel and can double as mosquito repellents when used with citronella oil.
Materials Needed:
- Bamboo poles or sturdy sticks
- Small metal canisters or bottles with screw lids
- Wick (cotton rope or tiki torch wick)
- Citronella oil or lamp oil
Step-by-Step Guide:
- Secure canisters to bamboo poles with wire or clamps.
- Fill with oil and insert wick.
- Light when needed, keeping a safe distance from flammable plants.
Place along pathways or patios for functional outdoor lighting and insect protection.
4. Glow-in-the-Dark Paint Projects
A budget-friendly way to light up your garden without electricity.
Ideas:
- Paint flower pots, stepping stones, or garden signs with glow-in-the-dark paint.
- Outline garden pathways with glow-painted rocks.
- Add designs to fences or trellises for nighttime charm.
Recharge glow-in-the-dark paint by placing objects in direct sunlight during the day.
These lighting projects combine practicality with beauty, ensuring your garden shines after sunset without high costs or complicated wiring.
Nature-Friendly Garden Projects
Gardens aren’t just for humans; they’re mini ecosystems that can attract and support wildlife. Creating DIY projects that welcome birds, bees, butterflies, and other helpful creatures makes your garden more vibrant and sustainable.
1. DIY Bird Feeders
Invites colorful birds, adds life to your garden, and supports local wildlife.
Options:
- Teacup Feeder – Glue a teacup to a saucer, attach a string, and hang it filled with birdseed.
- Plastic Bottle Feeder – Cut holes in a plastic bottle, insert wooden spoons as perches, and fill with seeds.
- Wooden Feeder – Use scrap wood to build a small house-shaped feeder.
Place feeders in shady spots near trees for protection.
2. Bird Baths from Repurposed Materials
Birds need water to drink and bathe, especially in summer.
Materials Needed:
- Large bowl, old sink basin, or even a repurposed tire
- Bricks or stands to raise it off the ground
Step-by-Step Guide:
- Place bowl on a stand or bury halfway for stability.
- Fill with clean water.
- Add stones for perching.
Create a tiered bird bath with stacked plant pots and bowls.
3. DIY Bee Hotels and Insect Houses
Helps pollinators thrive, which is essential for gardens.
Materials Needed:
- Wooden box or old crate
- Hollow bamboo sticks, drilled wood blocks, pinecones, straw
Step-by-Step Guide:
- Fill box with bamboo pieces, drilled wood, and natural materials.
- Place in a sunny, sheltered spot.
- Watch bees and insects find a safe nesting place.
Keep it chemical-free, no treated wood or paints.
4. Butterfly Feeder Station
Attracts butterflies for beauty and pollination.
Materials Needed:
- Shallow dish or saucer
- Sponge
- Sugar-water mix (1 part sugar to 9 parts water)
- Ripe fruit slices (bananas, oranges, watermelon)
Step-by-Step Guide:
- Soak sponge in sugar-water.
- Place in dish with fruit slices.
- Set in sunny flower bed.
Surround with nectar-rich flowers like lavender or zinnias.
These projects turn your backyard into a wildlife sanctuary, supporting biodiversity while adding charm.
Practical Gardening Projects
These projects focus on functionality, making gardening easier, more productive, and eco-friendly.
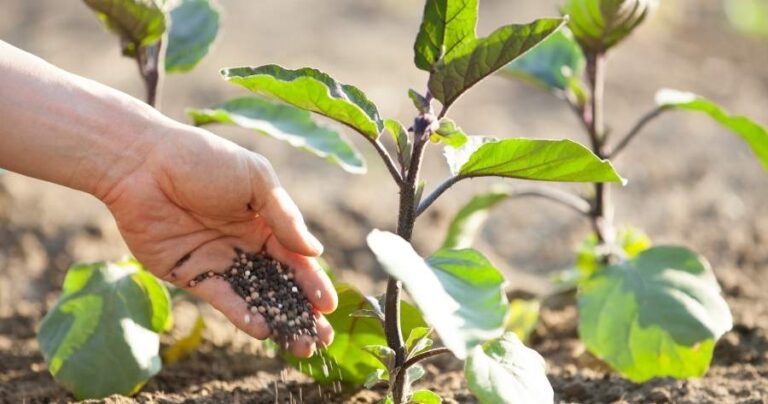
1. DIY Compost Bin
Turns food scraps and yard waste into nutrient-rich soil.
Materials Needed:
- Wooden crate, old plastic bin, or pallet box
- Drill (for airflow holes)
Step-by-Step Guide:
- Drill holes in the bin for ventilation.
- Alternate layers of “greens” (fruit/veg scraps, grass) and “browns” (leaves, paper, sawdust).
- Keep moist and turn weekly.
- Harvest compost in 2–3 months.
Avoid meat and oily foods to prevent pests.
2. Rainwater Harvest Barrel
Saves water bills and helps during dry seasons.
Materials Needed:
- Large barrel with lid
- Spigot/tap kit
- Mesh screen (to keep out debris and mosquitoes)
Step-by-Step Guide:
- Position under gutter downspout.
- Install spigot at the bottom for easy access.
- Cover top with mesh to keep clean.
Use collected water for garden irrigation only, not for drinking.
3. DIY Garden Trellis
Supports climbing plants like cucumbers, beans, and flowers.
Options:
- Branch trellis – Tie long sticks into a teepee.
- PVC trellis – Lightweight and durable.
- Wire trellis – Attach wires between fence posts.
Paint or stain wooden trellises for durability.
4. Raised Garden Beds
Better drainage, less bending, and neat planting zones.
Materials Needed:
- Wooden planks, bricks, or cinder blocks
- Screws/nails (if using wood)
- Soil and compost mix
Step-by-Step Guide:
- Build rectangular/square frame.
- Place on level ground.
- Fill with soil and compost.
- Plant vegetables, herbs, or flowers.
Line bottom with cardboard to block weeds.
These projects make gardening easier and more productive; perfect for anyone serious about homegrown produce and sustainability.
Creative & Fun Weekend Extras
These projects are about fun, creativity, and relaxation; perfect for personalizing your space.
1. Mini Pond in a Barrel or Container
- Use half a wine barrel, old tub, or ceramic container.
- Add a pond liner, water plants, and floating solar fountain.
- Great for creating a tranquil garden feature.
2. Outdoor Seating from Pallets or Bricks
- Stack pallets with cushions for instant rustic benches.
- Use bricks and planks for simple garden benches.
- Paint or stain for style and weather protection.
3. Upcycled Garden Art
- Bottle borders around flower beds.
- Old tires painted as colorful planters.
- DIY windmills or spinners from cans.
4. Herb Drying Rack
- Use old frames or wooden dowels.
- Tie herbs with twine and hang upside down.
- Place in a shady spot to dry naturally.
These extras make your garden unique and personal, perfect conversation starters when guests visit.
Conclusion
Gardening is not just about growing plants, it’s about creating a space that reflects your personality, values, and creativity. The best part? You don’t need expensive landscaping or professional tools. With a free weekend, some simple materials, and a DIY spirit, you can make incredible transformations.
From practical builds like compost bins and raised beds to decorative touches like painted pots and fairy-light bottles, these projects show that gardening is about both function and fun. They encourage sustainability, bring families together, and make your outdoor space more enjoyable year-round.
So, this weekend, instead of scrolling endlessly for ideas, pick one project and try it out. Start small, maybe with painted flowerpots or a DIY bird feeder, and before you know it, you’ll be building trellises, mosaics, and compost bins like a pro.
Your garden is your canvas. Make it a place where nature thrives, family gathers, and creativity blooms.