Gardening at home doesn’t have to require a large yard or expensive equipment. In fact, one of the simplest and most effective ways to grow your own fresh vegetables, herbs, or flowers is by using everyday buckets as containers. Bucket gardening is perfect for anyone with limited space, whether you live in an apartment, have a small balcony, or just want a portable garden you can move around easily.
Growing plants in buckets lets you control the soil quality, water levels, and placement, making it easier to nurture healthy plants and enjoy fresh homegrown produce all year round. Plus, it’s budget-friendly and a fun way to connect with nature, even in an urban setting.
In this guide, we’ll walk you through everything you need to know to start your own small home garden in buckets, from selecting the right containers and soil to choosing plants and caring for them, so you can enjoy the satisfaction and benefits of gardening, no matter your space or experience level.
Why Buckets Are Great For Gardening
Buckets are one of the most practical and convenient containers you can use for home gardening, especially if you’re short on space or just starting out. Here’s why buckets make an excellent choice for growing plants:
- Affordable and Accessible: Buckets are inexpensive and widely available. You can often repurpose old buckets from around the house, making gardening budget-friendly.
- Portable: Unlike in-ground gardens, buckets are easy to move. You can rearrange them to catch the best sunlight or bring them indoors during bad weather.
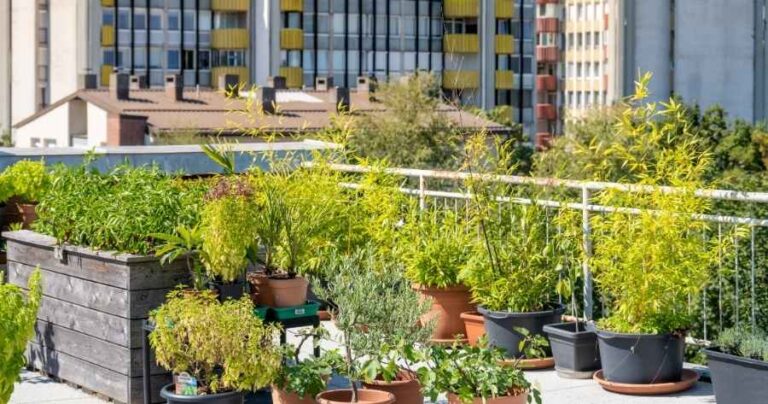
- Space-Saving: Buckets are perfect for small spaces like balconies, patios, rooftops, or even windowsills, allowing you to grow a garden anywhere, even in urban environments.
- Control Over Soil and Water: Using buckets lets you control the type of soil and drainage your plants get, which is essential for healthy growth and preventing issues like root rot.
- Versatile: Buckets come in various sizes, so you can choose the right size for different plants; from shallow buckets for herbs to deeper ones for root vegetables like carrots and potatoes.
- Pest and Weed Management: Growing in buckets reduces the risk of pests and weeds compared to traditional garden beds, saving you time and effort.
- Ideal for Beginners: Bucket gardening is straightforward, making it perfect for beginners who want to learn gardening basics without a big commitment.
Best Vegetables To Grow In Buckets
Not all vegetables need a big backyard or raised bed to thrive. Many grow perfectly well in buckets, producing an impressive harvest even in small spaces. The key is choosing plants that adapt easily to container life and giving them the right growing conditions. Here are some of the best vegetables to grow in buckets, along with quick care tips for each:
1. Tomatoes
Tomatoes are one of the most popular and rewarding choices for bucket gardening. They grow beautifully in 5-gallon buckets with proper support from stakes or cages. Choose compact or dwarf varieties for best results. Keep the soil moist and place the bucket in full sunlight for at least 6–8 hours a day.
2. Peppers (Bell or Chili)
Peppers thrive in containers and need plenty of sunlight and warmth. They do best in buckets with rich, well-draining soil. Regular watering and feeding will keep them producing crisp, colorful fruits throughout the season.
3. Lettuce and Leafy Greens
Fast-growing and low-maintenance, leafy greens like lettuce, spinach, and kale are perfect for shallow buckets. They don’t need full sun all day, partial sunlight works just fine. You can harvest the outer leaves continuously for a steady supply.
4. Carrots
Carrots grow surprisingly well in deep buckets with loose, sandy soil that allows their roots to stretch. Choose shorter varieties like Nantes or Chantenay if your bucket isn’t very deep. Keep the soil consistently moist but not soggy.
5. Green Onions (Spring Onions)
Green onions are easy to grow from seeds or kitchen scraps. They don’t need much space, and you can grow several in one bucket. They thrive in moderate sunlight and can be harvested in just a few weeks.
6. Cucumbers
Cucumbers love warm weather and sunlight. Choose bush or compact varieties and give them a small trellis or support to climb. They grow fast and will reward you with crisp, refreshing fruits all season long.
7. Radishes
Radishes are one of the quickest vegetables to grow, ready for harvest in as little as 3 to 4 weeks! They do well in smaller buckets and prefer cooler temperatures, making them great for spring or fall planting.
8. Potatoes
Potatoes thrive in deep buckets and are surprisingly easy to grow. Start with seed potatoes and add more soil as the plant grows to encourage tuber formation. When the leaves begin to die back, it’s harvest time!
9. Beans (Bush Varieties)
Bush beans are compact and perfect for bucket gardens. They require full sun and regular watering but produce a steady harvest of crisp, delicious beans within 6–8 weeks.
10. Herbs (Basil, Mint, Parsley, Cilantro)
Herbs are the ultimate bucket plants, they require little space, grow quickly, and can be harvested regularly. Keep them in a sunny spot and water moderately for a constant supply of fresh flavor.
Mix and match a few different vegetables and herbs in your bucket garden for variety and better use of space. Just make sure each plant has enough room for its roots to grow comfortably.
What Kind Of Buckets You Need
Choosing the right buckets is the first and most important step in setting up a successful home bucket garden. Not all containers are created equal, using the wrong type can lead to poor drainage, overheating, or even chemical leaching. Here’s what to look for when selecting buckets for your garden:
1. Use Food-Grade Buckets
Always choose food-safe plastic buckets (often labeled “BPA-free” or “food-grade”) to ensure harmful chemicals don’t leach into your soil and plants. You can often find these at hardware stores, bakeries, or restaurants, many will even give them away for free!
2. Ideal Size: 5 Gallons or Larger
A 5-gallon bucket is the most common and versatile size for home gardening. It’s deep enough to support most vegetables, from tomatoes and peppers to root crops like carrots and potatoes. For herbs or smaller greens, you can use 2- or 3-gallon buckets.
3. Add Drainage Holes
Proper drainage is essential. Without it, water can pool at the bottom, leading to root rot. Drill 4–6 small holes in the bottom of each bucket to allow excess water to escape. You can also add a few along the lower sides for better aeration.
4. Choose Light-Colored Buckets
If you live in a hot climate, go for white or light-colored buckets to prevent the soil from overheating in direct sunlight. Dark colors absorb heat and can stress the roots, especially during summer.
5. Durable and Weather-Resistant Material
Your buckets should be made of thick, sturdy plastic that can withstand sun exposure, rain, and regular watering without cracking or warping. Avoid thin or brittle plastic containers that deteriorate quickly outdoors.
6. Add Handles for Mobility
Buckets with sturdy handles make it easier to move plants around for better sunlight or to protect them from bad weather. Portability is one of the main advantages of bucket gardening, so take advantage of it!
If you want to improve drainage and reduce soil weight, place a few inches of gravel, pebbles, or broken pot pieces at the bottom of each bucket before adding soil.
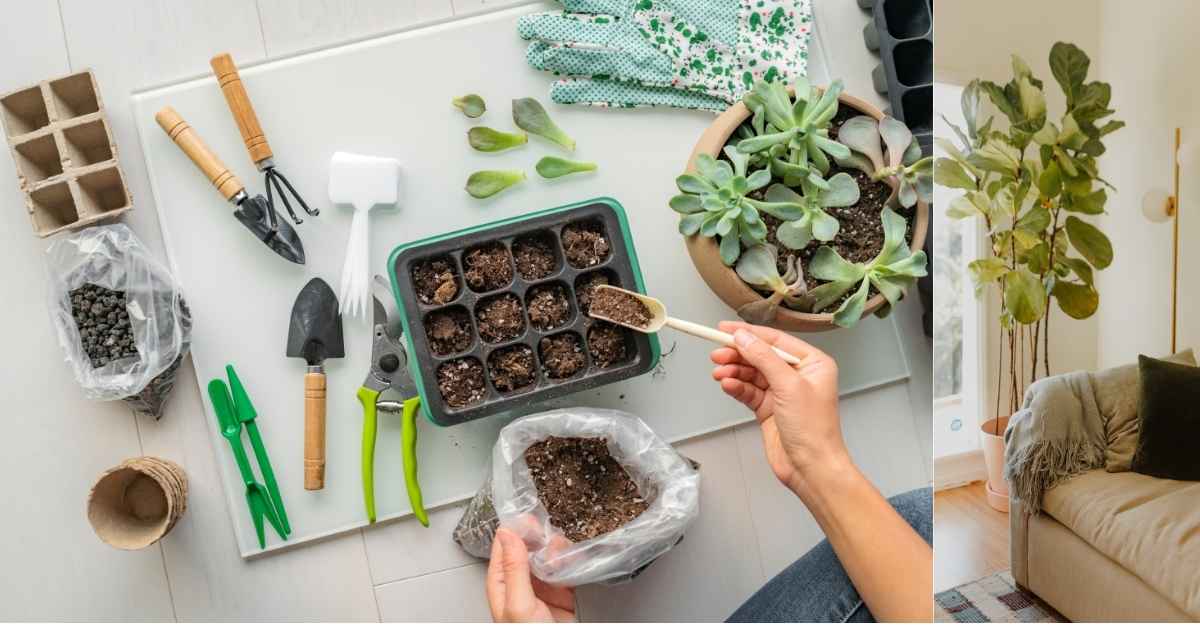
Soil Mix For Success
The secret to a thriving bucket garden lies in the quality of your soil mix. Unlike ground gardening, where plants can spread their roots freely, container plants depend entirely on the soil you provide. The right mix ensures good drainage, aeration, and nutrients, everything your plants need to stay healthy and productive. Here’s how to create the perfect bucket garden soil mix:
1. Use a High-Quality Potting Mix
Start with a premium potting mix, not regular garden soil. Garden soil is often too heavy for containers, it compacts easily, blocks airflow, and can harbor pests or diseases. Potting mix, on the other hand, is lighter and designed to retain moisture while allowing excess water to drain.
2. Add Compost for Nutrients
Mix in organic compost or well-rotted manure to enrich your soil with essential nutrients. Compost helps feed your plants naturally, supports healthy root growth, and encourages beneficial microorganisms. Use about 1 part compost to 2 parts potting mix.
3. Improve Drainage with Perlite or Sand
To prevent soggy soil, add materials like perlite, coarse sand, or vermiculite. These ingredients improve aeration and drainage, ensuring roots don’t suffocate. About 10–20% of your mix should be drainage material.
4. Add Coco Peat or Peat Moss for Moisture Balance
Coco peat (or peat moss) helps the soil retain moisture without becoming waterlogged. This is especially useful in hot climates or for plants that need consistent hydration, like tomatoes and lettuce.
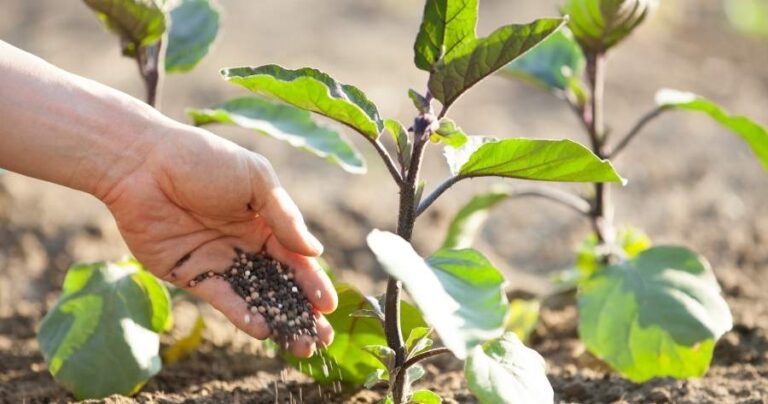
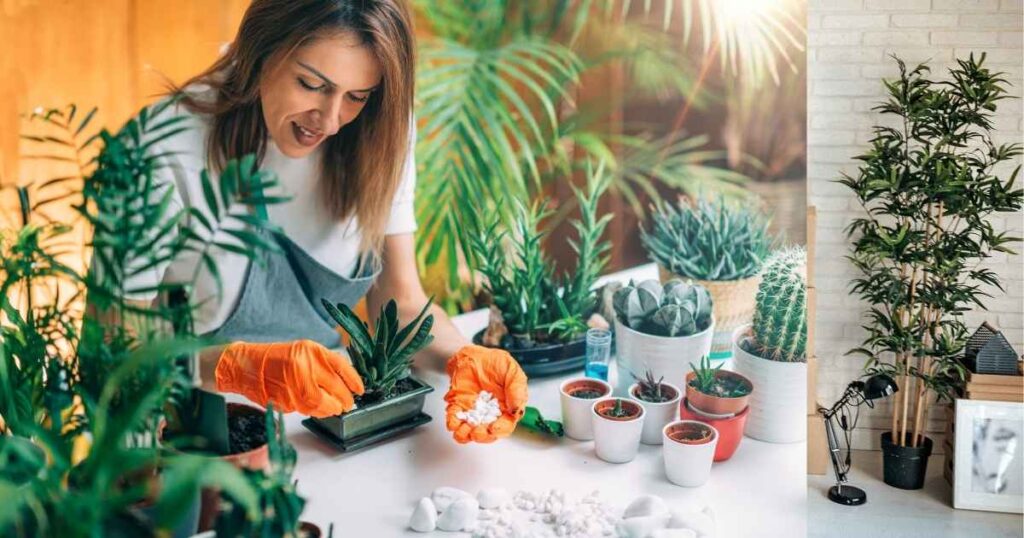
5. Optional: Add Organic Fertilizer or Worm Castings
If you want to give your plants an early boost, mix in organic slow-release fertilizer or worm castings. These provide a steady supply of nutrients over time and enhance overall soil health.
Sample DIY Bucket Soil Mix:
- 2 parts potting mix
- 1 part compost or aged manure
- ½ part perlite or coarse sand
- ½ part coco peat or peat moss
Mix thoroughly before filling your buckets, and leave about 2 inches of space at the top to make watering easier.
Where To Place Your Buckets
Placement is one of the most important factors in bucket gardening. Even with the right soil and plants, poor placement can lead to weak growth, pest problems, or low yields. To get the best results, you’ll want to position your buckets where your plants can get the right balance of sunlight, airflow, and protection. Here’s how to choose the perfect spot:
1. Find a Sunny Location
Most vegetables; especially tomatoes, peppers, and cucumbers, need at least 6 to 8 hours of direct sunlight daily. Place your buckets in an area that gets plenty of natural light, such as a balcony, patio, or backyard corner. If you’re growing shade-tolerant plants like lettuce or spinach, they’ll do fine with partial sunlight.
2. Ensure Good Air Circulation
Proper airflow helps prevent mold, mildew, and pests. Avoid crowding your buckets too close together; leave 6–12 inches of space between them so plants can breathe and grow freely.
3. Avoid High-Wind Areas
Strong winds can knock over buckets or damage tender plants. If your space is windy, place your buckets against a wall or railing for stability, or use heavier containers that won’t tip easily.
4. Watch for Drainage and Runoff
When watering your plants, excess water should drain out easily. Place buckets in a spot where the runoff won’t create puddles or damage floors; especially important for balconies or rooftops. You can set them on stands, trays, or gravel beds to improve drainage.
5. Use Mobility to Your Advantage
One of the best things about bucket gardening is flexibility. Move your buckets as the seasons change—toward more sun in spring, or into shade during extreme heat. You can even move them indoors temporarily during heavy rain or cold nights.
6. Make It Aesthetically Pleasing
Arrange your buckets neatly for a clean, attractive look. You can group taller plants at the back and smaller ones in front, or use colorful buckets to add personality to your mini garden space.
If you’re gardening on a balcony or deck, use lightweight buckets and trays underneath to catch water. This keeps your space clean while allowing your plants to thrive.
How To Care For Your Bucket Garden
Once your bucket garden is set up, proper care is key to keeping your plants healthy and productive. Bucket gardening is low-maintenance, but a consistent routine helps your plants thrive and produce a steady harvest. Here’s how to take care of your bucket garden the right way:
1. Water Regularly and Wisely
Bucket plants dry out faster than those grown in the ground, so check soil moisture daily, especially in hot weather. Water when the top inch of soil feels dry, and make sure excess water drains freely from the bottom. Avoid letting buckets sit in standing water, which can cause root rot.
2. Feed Your Plants
Because nutrients in buckets get depleted quickly, you’ll need to fertilize regularly. Use an organic liquid fertilizer every 2–3 weeks, or mix in slow-release granules at planting time. Compost tea and worm castings are great natural options that nourish plants without harsh chemicals.
3. Prune and Harvest Often
Remove yellowing or dead leaves to keep your plants looking fresh and disease-free. Regular harvesting, especially of greens, beans, and herbs, encourages more growth and helps plants stay productive.
4. Watch for Pests and Diseases
Check your plants regularly for signs of pests like aphids, caterpillars, or spider mites. If you notice damage, use natural remedies like neem oil, insecticidal soap, or garlic spray. Good airflow and clean surroundings also help prevent problems before they start.
5. Rotate and Reposition Your Buckets
Plants grow toward light, so rotate your buckets every week or two for even growth. You can also move them around as the seasons change to maintain the best sunlight exposure.
6. Refresh the Soil Between Seasons
After each harvest, remove dead roots and mix in fresh compost or new potting soil before planting again. This keeps your soil nutrient-rich and prevents diseases from building up.
7. Keep an Eye on Temperature
Extreme heat can dry out buckets quickly, while cold weather can stunt plant growth. In summer, provide partial shade during the hottest hours, and in cooler months, move your buckets to a warmer spot or indoors near a sunny window.
Keep a simple garden journal to track watering, fertilizing, and harvest times. It helps you understand what works best for your setup and improves your results each season.
Common Problems And Fixes
Even though bucket gardening is simple and beginner-friendly, a few common issues can arise if plants don’t get the right balance of water, nutrients, or sunlight. The good news is that most problems have easy fixes once you spot them early. Here’s a guide to the most frequent bucket gardening challenges and how to solve them:
1. Yellowing Leaves
Cause: Overwatering, nutrient deficiency, or poor drainage.
Fix: Check that your bucket has proper drainage holes and the soil isn’t waterlogged. Water only when the top inch of soil feels dry, and add compost or a balanced fertilizer to boost nutrients.
2. Wilting Plants
Cause: Underwatering, extreme heat, or root rot from too much water.
Fix: Test soil moisture; if it’s dry, water deeply. If it’s soggy, let it dry out and ensure drainage holes are clear. During hot days, move buckets to a shaded area or water early in the morning.
3. Stunted Growth
Cause: Not enough nutrients, crowded roots, or insufficient sunlight.
Fix: Feed plants regularly with organic fertilizer and make sure each plant has enough space to grow. Move the bucket to a sunnier spot if it’s not getting 6–8 hours of light daily.
4. Mold or Fungus on Soil Surface
Cause: Overwatering or poor air circulation.
Fix: Scrape off the mold, reduce watering frequency, and allow the soil to dry slightly between waterings. You can also sprinkle a little cinnamon powder on the surface, it’s a natural antifungal remedy.
5. Pests (Aphids, Whiteflies, or Caterpillars)
Cause: Common garden pests feeding on leaves and stems.
Fix: Spray leaves with neem oil or insecticidal soap every few days. Remove heavily infested leaves and encourage natural predators like ladybugs if gardening outdoors.
6. Root Rot
Cause: Overwatering or poor drainage.
Fix: Always ensure buckets have multiple drainage holes and use well-draining soil. If roots smell foul or appear black and mushy, discard the plant and replace the soil before replanting.
7. Plants Stop Producing Fruit
Cause: Nutrient imbalance or lack of pollination.
Fix: Add a fertilizer with more phosphorus and potassium (the middle and last numbers on the label) to encourage flowering and fruiting. If growing indoors, gently shake flowering plants to help with pollination.
8. Algae on Soil Surface
Cause: Too much moisture and low light exposure.
Fix: Reduce watering and move buckets to a sunnier location. You can also cover the soil with mulch to block light and prevent algae growth.
The key to preventing most problems is observation. Check your plants daily for any changes in color, texture, or growth, early action almost always saves the plant.
Harvest And Enjoy
One of the most rewarding moments in bucket gardening is harvest time, when you finally get to enjoy the fruits (and veggies!) of your effort. Knowing when and how to harvest is just as important as growing, because timing can make a big difference in taste, texture, and plant health. Here’s how to make the most of your homegrown produce:
1. Harvest at the Right Time
Each vegetable has its ideal harvest window. Leafy greens like lettuce and spinach can be picked as soon as the leaves are large enough to eat, while root vegetables like carrots or radishes are best harvested once their tops begin to show slightly above the soil. For fruiting plants like tomatoes and peppers, wait until they’re fully colored and firm.
2. Pick Often to Encourage Growth
Regular harvesting keeps your plants productive. When you pick mature fruits or trim outer leaves, the plant channels more energy into producing new growth. For example, the more you pick beans or peppers, the more they’ll produce throughout the season.
3. Handle with Care
Use clean scissors or pruning shears to avoid damaging plants when harvesting. Tugging or twisting can injure stems and reduce future yields.
4. Clean and Store Properly
After harvesting, rinse your vegetables gently and let them dry before storing. Leafy greens stay crisp longer when wrapped in a damp cloth or stored in an airtight container in the fridge. Root vegetables last longer when kept cool and dry.
5. Enjoy Your Fresh Produce
Now comes the best part, enjoying your homegrown food! Use your fresh herbs, greens, and veggies in salads, stir-fries, smoothies, or soups. There’s nothing more satisfying than eating something you’ve grown yourself, knowing it’s healthy, fresh, and chemical-free.
Keep track of your harvests in a notebook or on your phone. This helps you learn which plants performed best and plan even better bucket gardens in future seasons.
Conclusion
Starting a small home garden in buckets is one of the easiest, most rewarding ways to enjoy fresh, homegrown produce, no large yard or fancy tools required. With just a few buckets, some good soil, and a little care, you can grow a surprising variety of vegetables, herbs, and even small fruits right on your balcony, patio, or doorstep.
Bucket gardening gives you full control over your growing environment, soil quality, watering, and sunlight, while also keeping pests and weeds to a minimum. It’s flexible, affordable, and perfect for both beginners and experienced gardeners looking to maximize space.
Whether you’re growing crisp lettuce, juicy tomatoes, or flavorful herbs, the joy of harvesting your own food never fades. Each bucket becomes its own little ecosystem, a simple reminder that anyone, anywhere, can grow something beautiful and useful with a bit of patience and consistency.
So grab a few buckets, plant your favorite seeds, and start your own mini garden today. You’ll be amazed at how much life, and flavor; you can grow in such a small space.
Frequently Asked Questions (FAQs)
1. Can I use any bucket for gardening?
You can use almost any bucket as long as it’s food-grade and has drainage holes at the bottom. Avoid buckets that previously held chemicals or paint, as they can leach toxins into the soil.
2. How many holes should I drill in each bucket?
Drill 4 to 6 holes in the bottom of each bucket to ensure proper drainage. If possible, add a few small holes around the lower sides for better airflow.
3. What size bucket is best for growing vegetables?
A 5-gallon bucket works best for most vegetables like tomatoes, peppers, and beans. Smaller buckets (2–3 gallons) are fine for herbs or leafy greens.
4. How often should I water my bucket plants?
Check the soil daily and water whenever the top inch feels dry. Buckets tend to dry out faster than garden beds, especially in hot weather.
5. Do I need to fertilize plants in buckets?
Yes. Nutrients in containers wash out over time, so feed your plants with a liquid organic fertilizer every 2–3 weeks or use slow-release fertilizer when planting.
6. Can I reuse the same soil every season?
You can reuse your soil if you refresh it with compost or organic fertilizer before each new planting. Remove old roots and check for pests or diseases first.
7. What vegetables grow best in buckets?
Tomatoes, peppers, lettuce, green onions, carrots, spinach, and herbs like basil and parsley grow very well in buckets.
8. Do bucket plants need full sunlight?
Most vegetables need 6–8 hours of sunlight daily. However, leafy greens like spinach and lettuce can do well with partial sunlight.
9. How do I prevent pests in my bucket garden?
Check plants regularly and use natural pest control methods like neem oil, garlic spray, or soap water. Good airflow and clean surroundings also help keep pests away.
10. Can I grow a bucket garden indoors?
Yes! If you have enough sunlight near a window or use grow lights, you can grow herbs, lettuce, or small vegetables indoors year-round.